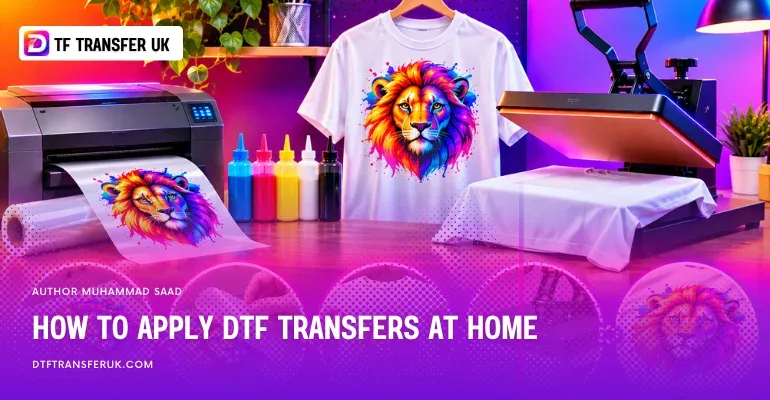
DTF transfers can be applied at home using a heat press, a handheld craft heat press, or a household iron, although a dedicated heat press provides the most consistent results.
The application process involves preparing the garment, positioning the printed design against the fabric, applying heat and pressure to activate the adhesive, removing the carrier film, and pressing the design again to improve adhesion.
For our hot peel DTF transfers, the published pressing instructions specify 150°C to 160°C for 10 to 15 seconds with medium to firm pressure, followed by a five second finishing press.
Household irons can work for some DTF transfers, particularly small designs, but their uneven heating and limited pressure control make successful application less predictable.
How to Apply DTF Transfers at Home?
Applying DTF transfers at home involves bonding a printed design to fabric using heat and pressure. DTF transfers arrive with the artwork printed on a carrier film and coated with heat activated adhesive, so you do not need a DTF printer, adhesive powder, or curing equipment to apply a ready to press transfer.
First, prepare a clean, dry garment and place it on a flat, heat resistant surface. Position the transfer with the printed and adhesive side facing the fabric and the clear carrier film facing upwards. Apply the temperature, pressure, and time recommended for your transfer, then remove the film according to its peel type. A final press helps secure the design to the textile.
The application requires the following materials:
A ready to press DTF transfer with its carrier film.
A clean T shirt, hoodie, sweatshirt, tote bag, or other suitable fabric item.
A heat press, handheld craft heat press, or suitable household iron.
A stable, flat, heat resistant pressing surface.
A Teflon sheet or suitable heat resistant parchment paper for protecting the print.
A lint roller and optional heat resistant tape for garment preparation and accurate placement.
Heat activates the transfer's adhesive, while pressure brings the adhesive into contact with the garment fibres. If either is insufficient, sections of the print may fail to bond and begin lifting during peeling or washing.
Check the garment's care label before application. Cotton, polyester, and blended fabrics have different heat tolerances, and some textile coatings or finishes may interfere with adhesion.
What Are the Ways to Apply DTF Transfers at Home?
There are three practical ways to apply DTF transfers at home: a dedicated heat press, a handheld craft heat press, and a household iron. Each method uses heat and pressure to bond the design to fabric, but they differ in temperature accuracy, pressure consistency, and suitability for larger prints.
Application Method | Best Suited For | Application Control |
|---|---|---|
Dedicated heat press | T shirts, hoodies, large designs, and repeat orders | Controlled temperature, timing, and adjustable pressure |
Handheld craft heat press | Small designs, occasional projects, and home crafting | Controlled temperature on suitable models, with manually applied pressure |
Household iron | Small transfers and occasional personal projects | Limited temperature accuracy and uneven manual pressure |
Can You Apply DTF Transfers With a Handheld Craft Heat Press?
Yes, DTF transfers can be applied with a compatible handheld craft heat press, such as a Cricut EasyPress, provided the equipment reaches the required temperature and supplies adequate pressure.
A handheld craft press has a heated plate that can provide more consistent surface contact than a conventional iron. Models with digital temperature and timer controls also allow more precise application settings.
Place the garment on a compatible pressing mat supported by a stable surface. Preheat the fabric, position the transfer, and apply the temperature and timing specified by the transfer supplier.
Keep the press level and apply the recommended pressure throughout the pressing period. If the design is larger than the heated plate, multiple applications may be necessary. Overlapping sections can produce uneven heating, so large artwork is better suited to a heat press with a platen that covers the complete design.
Follow the correct hot peel or cold peel instructions for the specific transfer. A handheld press does not change the carrier film's required removal method.
Can You Apply DTF Transfers Without a Heat Press or Iron?
DTF transfers require an appropriate source of heat and pressure to activate their adhesive and bond the design to the garment. They cannot be reliably applied using hand pressure alone.
A hair dryer is not a suitable substitute for a heat press because it cannot provide the sustained, controlled contact pressure needed to bond the transfer uniformly to the fabric.
For customers without pressing equipment, a compatible handheld craft press is an option worth considering. A local garment printing service can also apply ready to press transfers using professional equipment.
What Are the Heat Press Instructions for DTF Transfers at Home?
The heat press instructions for our DTF transfers are to prepress the garment for 2 to 3 seconds, position the transfer printed side down, press at 150°C to 160°C for 10 to 15 seconds using medium to firm pressure, remove the film while hot, and apply a finishing press for 5 seconds using a Teflon sheet.
These settings apply to our published hot peel transfer instructions. Different transfer films and garment materials may require different conditions.
Heat Press Setting | Recommended Instructions |
|---|---|
Prepress | 2 to 3 seconds |
Temperature | 150°C to 160°C |
Main pressing time | 10 to 15 seconds |
Pressure | Medium to firm |
Film removal | Hot peel |
Finishing press | 5 seconds |
Finishing protection | Teflon sheet |
Step 1: Set Up and Preheat the Heat Press
Place the heat press on a stable work surface and set its temperature between 150°C and 160°C. Adjust the timer to 10 to 15 seconds and select medium to firm pressure.
Allow the platen to reach its operating temperature before placing the garment inside.
A heat press with inconsistent temperature or uneven pressure can produce areas of weak adhesion, even when the displayed settings appear correct.
Step 2: Prepare the Garment
Place the garment flat on the lower platen with the intended printing area facing upwards. Remove lint, dust, and loose fibres from the fabric.
Prepress the garment for 2 to 3 seconds to reduce surface moisture and flatten wrinkles.
Make sure thick seams, pockets, collars, and zips do not interfere with pressure across the design. Use a suitable pressing pillow or reposition the garment when necessary.
Step 3: Position the DTF Transfer
Place the DTF transfer on the garment with its printed and adhesive side facing downwards against the fabric. The clear carrier film should remain on top.
Align the design using the garment's centreline, neckline, and available printing area.
For a full front T shirt design, the print is commonly positioned several centimetres below the collar, with the exact distance adjusted to the garment size and artwork dimensions.
Check alignment before pressing because the design cannot be repositioned after the adhesive bonds to the fabric.
Step 4: Apply Heat and Pressure
Close the heat press and apply medium to firm pressure for 10 to 15 seconds at the specified temperature.
Maintain consistent contact across the entire transfer. Insufficient pressure can leave edges or small details incompletely bonded, while excessive heat may cause fabric scorching, shine, or damage to sensitive materials.
Keep the garment stationary during the application. Avoid moving or stretching the fabric while the adhesive is hot.
Step 5: Remove the Carrier Film While Hot
Open the heat press and carefully remove the carrier film while the transfer remains hot, following the specified hot peel procedure.
Start from one corner and peel smoothly while keeping the garment flat.
Inspect the design as the film separates. If an area begins to lift with the carrier, stop peeling and lower the film back into position. Reapply controlled heat and pressure to the affected area before attempting to peel again.
Do not forcefully pull the film away from an incompletely bonded design.
Step 6: Apply the Finishing Press
After removing the carrier film, cover the printed design with a Teflon sheet.
Press again for 5 seconds using the recommended heat press settings. This finishing step helps consolidate the adhesive bond and improves contact between the transfer and fabric.
Remove the protective sheet and allow the garment to cool naturally.
Check the finished print for clean edges, consistent adhesion, and any sections that may require further attention. Avoid stretching the printed area while it remains hot.
What Are the Instructions for Applying DTF Transfers at Home With an Iron?
DTF transfers can sometimes be applied at home using a household iron by switching off the steam function, working on a firm, heat resistant surface, and pressing the transfer in sections with steady downward pressure. This method is more suitable for small designs than large garment graphics because a household iron cannot maintain the same temperature accuracy and pressure consistency as a heat press.
Our published application specifications are designed for heat press equipment. The household iron procedure below is a general alternative used for compatible DTF transfers, not a verified application setting for every transfer we supply.
Step 1: Choose a Suitable Garment and Work Surface
Start with a clean cotton garment or another fabric approved for the intended application temperature.
Place the garment on a stable, flat, heat resistant surface that can withstand firm pressure. Avoid soft or heavily padded ironing boards because the padding can absorb pressure and prevent even contact between the transfer and garment.
Protect the work surface with equipment suitable for heat pressing. Do not apply high heat directly to surfaces that may melt, scorch, or become damaged.
Step 2: Prepare the Household Iron
Empty the water reservoir and switch off the steam function. Moisture released through the iron's soleplate can interfere with transfer application.
For cotton garments, a cotton heat setting is a common starting point in household iron instructions, but actual temperatures vary between models. Allow the iron to heat fully and test the setting before applying the final design.
Do not assume that a cotton setting is safe for polyester, nylon, or heat sensitive fabrics. If you cannot confirm that the iron operates within a suitable temperature range, use a temperature controlled heat press instead.
Step 3: Preheat the Fabric
Press the intended printing area briefly with the dry iron to remove wrinkles and residual moisture.
Keep the garment smooth and ensure that there are no folds beneath the design. Allow the fabric to lie flat before positioning the transfer.
Step 4: Position and Protect the Transfer
Place the DTF transfer with its printed adhesive side against the garment and its carrier film facing upwards.
Cover the transfer with a suitable heat resistant parchment sheet or protective pressing sheet where permitted by the transfer's instructions.
Keep the design completely flat and check that its position is correct before applying pressure.
Step 5: Press the Design in Sections
Press the iron straight down over the transfer rather than sliding it across the garment.
For DTF transfers approved for household iron application, some suppliers recommend approximately 15 to 20 seconds per section. This is a general reference, not a validated pressing duration for our transfers.
Apply firm, consistent pressure and ensure the iron covers each section completely. If the design is larger than the soleplate, lift the iron and move it to the next section, allowing slight overlap to avoid missing edges and corners.
Avoid excessive repeated heating, particularly on polyester or garments with heat sensitive dyes.
Step 6: Peel the Carrier Film Carefully
Follow the peel instructions provided with the transfer. Hot peel film must be removed while hot, whereas cold peel film requires cooling before removal.
For a hot peel transfer, carefully check adhesion while the film is still at the specified peeling temperature. A household iron may leave some sections less securely bonded than others.
If any printed detail lifts with the carrier, stop removing the film. Return it to position, cover the area, and apply appropriate additional heat and pressure before checking again.
Step 7: Apply a Protective Finishing Press
Once the carrier film has been removed successfully, cover the printed design with suitable protective parchment paper or a Teflon sheet.
Apply a short finishing press to each section using firm pressure, following the instructions for the particular transfer. Avoid placing the iron directly against the exposed ink surface.
Allow the garment to cool flat before handling, folding, or stretching it.
For continued care, wait at least 24 hours before washing, turn the garment inside out, use a gentle wash cycle with cold water, and air dry where possible. Consistent garment care helps protect the print, although it cannot compensate for insufficient adhesion during the original application.