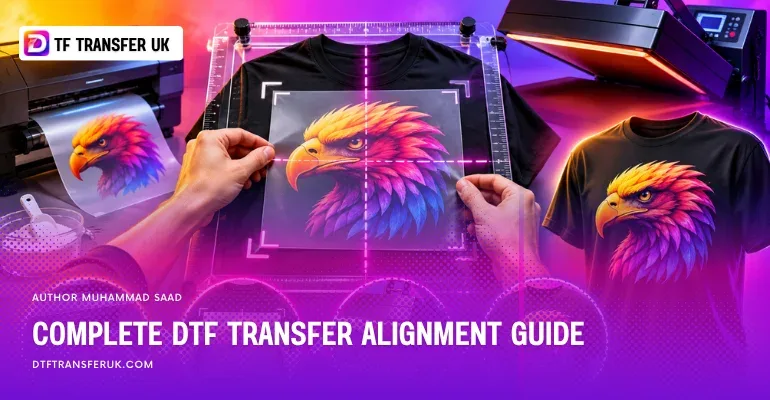
DTF transfer alignment is the process of positioning a printed design accurately on a garment before heat pressing. Proper alignment requires finding the garment's centerline, measuring the artwork's placement, selecting a suitable print size, and keeping the transfer straight during application.
A reliable alignment process starts with preparing the garment, identifying its vertical and horizontal reference points, and measuring from the collar or shoulder seams. Placement measurements differ for full-front prints, left-chest logos, back designs, and sleeves. Garment size, neckline shape, and design dimensions also affect the final position.
Common DTF placement mistakes include crooked designs, incorrect centering, prints positioned too high or low, and transfers that shift during pressing. These problems can be prevented with alignment rulers, consistent reference points, heat-resistant tape when needed, and a final placement check before applying heat.
What Is DTF Transfer Alignment?
DTF transfer alignment is the process of positioning a Direct-to-Film (DTF) design at the intended location and orientation on a garment before pressing it with heat.
Alignment involves two important measurements:
Horizontal alignment: Determines whether the artwork is centered or correctly offset toward a particular print location, such as the left chest.
Vertical alignment: Determines how high or low the artwork sits relative to the collar, shoulder, or other garment reference points.
A design can be horizontally centered but still appear incorrect if it sits too low. Similarly, a transfer positioned at the correct distance below the collar can look crooked if the garment or artwork is rotated.
Transfer Express recommends using the collar or shirt tag to establish a vertical centerline and the underarm seams to identify a horizontal reference line. These lines provide a starting point for positioning the transfer, although the design's shape may require adjustments.
Why Is Proper DTF Transfer Alignment Important?
Proper DTF transfer alignment helps designs appear balanced, maintains consistent placement across multiple garments, and reduces the chance of visible positioning errors.
A centered design should relate correctly to the garment's shape rather than simply the edges of the transfer film. This distinction becomes especially important when artwork has uneven transparent margins or an asymmetrical design.
For example, a shirt logo may appear centered on its carrier film but look off-center after application if the printed artwork occupies more space on one side.
Accurate alignment is also important for repeat orders. When multiple shirts are produced with the same design, using consistent measurements helps maintain a similar appearance throughout the batch.
What Tools Are Needed for DTF Transfer Alignment?
DTF transfer alignment can be performed with basic measuring tools or specialized positioning equipment.
Tool | Purpose |
|---|---|
Measuring tape or ruler | Measures distances from collars, seams, and garment centerlines |
T-shirt alignment ruler | Helps identify centered and left-chest print positions |
T-square | Checks horizontal and vertical alignment |
Heat-resistant tape | Helps prevent transfer movement during pressing |
Heat press | Provides the controlled heat and pressure required for application |
Alignment lasers | Provide repeatable positioning references during production |
Paper design template | Helps preview artwork dimensions before pressing |
A regular ruler is sufficient for many individual shirts. Alignment rulers and laser systems become more useful when decorating repeated designs or larger quantities.
Transfer Express describes rulers, garment reference lines, and placement tools as different ways to position transfers. STAHLS also recommends laser alignment for maintaining consistent left-chest placement during repeated production.
How Do You Align DTF Transfers on a T-Shirt?
To align a DTF transfer on a T-shirt, follow seven steps: prepare the garment, find its centerline, identify the reference position, locate the artwork's center, measure its placement, secure the transfer when necessary, and verify everything before pressing.
Step 1: Prepare the Garment
First, place the T-shirt flat on the lower platen of the heat press. Smooth the fabric without stretching or twisting it.
Check that the shoulders and lower portion of the garment are straight. A shirt may appear aligned at the neckline while remaining twisted farther down.
Keep wrinkles, bulky seams, and other obstructions away from the pressing area.
If the transfer supplier recommends pre-pressing, follow those instructions to flatten the fabric and remove moisture. Pre-pressing requirements differ between DTF products.
Step 2: Find the Vertical Centerline
Secondly, identify the garment's vertical center.
A practical method is to fold the shirt lengthwise so the two halves align. A light center crease can provide a reference for placing artwork.
Alternatively, use the neckline to visualize a straight line down the garment.
The neck tag may help identify the center, but it should not be treated as a perfect reference. Transfer Express specifically notes:
"The tag is not always perfectly centered.
Step 3: Identify the Horizontal Reference Line
Thirdly, locate the underarm seams on both sides of the shirt.
Imagine a horizontal line running from one underarm seam to the other. The intersection of this line and the vertical centerline creates a reference point for positioning the design.
This intersection does not mean every design must be centered exactly there.
For instance, wide, short artwork may need to sit higher than a tall graphic. Transfer Express recommends adjusting the position according to the artwork's shape.
Step 4: Find the Center of the Printed Artwork
Fourthly, identify the center of the actual DTF artwork rather than automatically using the center of its carrier film.
Transparent margins may be uneven, particularly when individual transfers have been cut from a gang sheet.
For symmetrical designs, measure the printed artwork's width and identify its midpoint. A gentle fold of the carrier margins can also help mark the center, provided the printed design is not damaged.
For asymmetrical designs, compare the artwork visually with the garment's centerline and adjust its position as needed.
Step 5: Measure the Placement
Fifthly, measure the required distance from the garment's chosen reference point.
For a standard adult crewneck T-shirt, Ninja Transfers recommends positioning many center-chest and full-front designs approximately 3 inches below the bottom of the collar.
However, this distance should be measured to the top of the printed artwork, not to unused transparent film above it.
Check both the artwork's upper edge and overall dimensions before deciding on the final position.
Step 6: Secure the Transfer
Sixthly, place the transfer in its final position, with the printed adhesive side facing the fabric according to the supplier's instructions.
If the transfer tends to move, use small pieces of heat-resistant tape around the carrier edges.
Ninja Transfers recommends thermal tape to keep transfers securely positioned during pressing, particularly on items that are difficult to hold flat.
Step 7: Verify the Alignment Before Pressing
Finally, inspect the garment and transfer from directly above.
Confirm that the design is straight, correctly oriented, and positioned at the intended distance from the neckline or other reference point.
Check that the shirt remains flat and that its fabric has not shifted while adjusting the transfer.
Once the placement is correct, apply the transfer using its manufacturer's specified pressing and peeling instructions.
Where Should You Place DTF Transfers on Different Parts of a Shirt?
DTF transfer placement depends on the intended print location, the artwork's dimensions, and the garment's size.
The following measurements are starting points derived from Ninja Transfers' placement guide. They are not universal requirements.
DTF print location | Typical adult design width | Starting placement |
|---|---|---|
Left chest | 2.5–4.5 inches | Approximately 3 inches below the collar; positioned toward the wearer's left |
Center chest | 6–10 inches | Approximately 3 inches below the collar, centered |
Full front | 10–12 inches | Approximately 3 inches below the collar, centered |
Full back | 11–13 inches | Approximately 4 inches below the back collar, centered |
Upper back | 10–14 inches | Approximately 4 inches below the collar, centered |
Back collar | 1–3 inches | Approximately 1–2 inches below the back collar |
Short sleeve | 1–3.5 inches | Centered on the sleeve, approximately 1 inch above its lower seam |
For left-chest designs, the horizontal offset matters as much as the vertical distance. Ninja Transfers suggests locating the design approximately 4–6 inches from the garment's centerline on many adult shirts.
A left-chest logo is placed on the wearer's left, which appears on the viewer's right when looking at the shirt from the front.
How Does Garment Size Affect DTF Transfer Alignment?
Garment size affects both the available printing area and the proportions of the finished design.
A transfer that fits an adult large shirt may appear oversized on a youth shirt. Conversely, a small transfer may look disproportionately narrow on a 3XL garment.
Ninja Transfers gives an example of a center-chest print averaging approximately 8 × 4 inches for adults and 6 × 3 inches for youth garments.
Different sizes may therefore require separate transfer dimensions rather than one artwork size for the entire order.
To maintain proportional alignment, first measure the usable print area of each garment size. Next, choose an artwork size that fits that space. Then establish placement measurements for each size group.
Finally, review a sample garment before producing the remaining shirts.
How Do You Align DTF Transfers on Hoodies, V-Necks, and Other Garments?
DTF alignment should be adjusted when a garment has a different neckline, shape, or construction.
V-neck and scoop-neck shirts: These garments have lower or differently shaped necklines than standard crewneck shirts. Transfer Express recommends placing the top of a full-size graphic approximately 1–1.5 inches below the neckline on many V-neck and scoop-neck designs, rather than automatically using its crewneck measurement of 3–3.5 inches.
Hoodies: Consider the hood, drawstrings, front pocket, and bulky seams before selecting the print location. A back design may need to sit lower to remain visible when the hood is down. Front artwork also needs sufficient clearance from the kangaroo pocket.
Polo shirts: Use the center placket and shoulder seam as reference points. Left-chest artwork should remain clear of buttons and raised stitching so the press can apply even pressure.
Sleeves: Align a small design with the sleeve's visible center or fold reference, ensuring it does not cross the cuff seam unnecessarily.
What Are the Common DTF Placement Alignment Mistakes?
Common DTF placement alignment mistakes involve incorrect centering, unsuitable vertical positioning, garment distortion, and transfer movement during application.
1. Centering the Carrier Film Instead of the Artwork
Transparent transfer film does not always have equal margins around the printed design. Centering the film can therefore leave the artwork visibly displaced.
2. Placing the Design Too High or Too Low
Using the same collar measurement for every garment and artwork shape can produce poorly balanced placement. A design may sit too close to the neckline or extend too far toward the abdomen.
3. Loading the Garment Crookedly
A shirt that is twisted or unevenly positioned on the heat press can produce a crooked result even when the transfer appears straight relative to the machine.
4. Ignoring the Garment's Actual Center
Using an off-center neck tag, uneven fabric edge, or unreliable seam as the only alignment reference can cause the transfer to sit away from the intended position.
5. Using the Wrong Transfer Size
Artwork that is too large for the available print area may crowd seams or garment edges. Artwork that is too small can appear visually unbalanced.
6. Allowing the Transfer to Shift During Pressing
An unsecured transfer may move while the press closes, particularly on uneven garments or curved accessories.
7. Ignoring Pockets, Zippers, and Thick Seams
Raised garment features can prevent the print area from remaining flat. This can affect both the design's position and the pressure applied during transfer.
8. Relying Only on Visual Estimation
Eyeballing every garment without checking reference measurements can create inconsistent placement across a batch.
Transfer Express identifies crooked, inverted, off-center, and incorrectly positioned designs among common heat-transfer placement errors.
How Can You Prevent DTF Placement Alignment Mistakes?
DTF placement alignment mistakes can be prevented by using accurate reference points, measuring the actual artwork, keeping garments flat, and maintaining consistent procedures.
The following preventive actions correspond to the mistakes described above.
Common mistake | How to prevent it |
|---|---|
Centering the carrier film | Identify and align the center of the printed artwork |
Positioning artwork too high or low | Measure from the correct garment reference point and account for design height |
Loading a shirt crookedly | Check both the shoulders and lower garment edges before placing the transfer |
Using an inaccurate center reference | Verify the centerline against the collar and garment shape |
Selecting the wrong design size | Measure the available print area and use proportional artwork dimensions |
Allowing the transfer to shift | Secure the carrier with suitable heat-resistant tape when necessary |
Pressing across bulky garment features | Reposition the garment, use an appropriate smaller platen, or isolate the printing area |
Eyeballing repeated placements | Record measurements and reuse the same alignment method throughout the batch |
For repeated shirt printing, check the first garment in each size group before proceeding with the rest.
Use the same collar reference, artwork dimensions, and horizontal alignment method for equivalent garments.
For example, if an approved full-front design begins 3 inches below the collar on a particular adult shirt style, use that measurement as the production reference for equivalent shirts. Recheck it when the garment style or size changes.
Laser alignment or a fixed placement ruler may also help reduce variation across repeated applications.
How Can You Keep a DTF Transfer Straight During Heat Pressing?
A DTF transfer can be kept straight during pressing by preparing a smooth garment surface, aligning the artwork before closing the press, and preventing unwanted carrier movement.
Heat-resistant tape can hold a transfer in its intended position when necessary.
The heat press should also close without dragging the transfer or disturbing its alignment.
For garments with buttons, pockets, or bulky seams, repositioning the garment or using suitable platen accessories can help create a flat application surface.
However, keeping the transfer straight is only one part of successful application.
Pressing temperature, time, pressure, protective-sheet use, and peeling method must follow the instructions supplied with the specific DTF transfer. These requirements are not identical across brands.
For example, Transfer Express provides application instructions for its UltraColor MAX DTF transfers that differ from the protective-sheet and final-press procedure described for some Ninja Transfers products.
How Can You Check DTF Transfer Alignment After Pressing?
DTF transfer alignment can be checked after pressing by examining the design's orientation, vertical position, horizontal balance, and relationship to the garment's seams.
First, lay the garment flat without stretching it.
Next, compare the design's center with the shirt's intended centerline or placement reference.
Then, inspect its distance from the collar, side seams, and other nearby garment features.
Finally, compare the print against the approved sample or recorded placement measurements if the shirt belongs to a production batch.
A completed transfer should also be checked for proper adhesion according to its manufacturer's instructions.
If a design is crooked or badly misplaced after it has bonded to the fabric, repositioning it is not equivalent to moving an unpressed transfer. The most reliable opportunity to correct alignment is before the initial press.
What Is the Best Way to Achieve Consistent DTF Transfer Alignment?
The best way to achieve consistent DTF transfer alignment is to establish a repeatable placement method for each garment style, design size, and printing location.
Begin by checking the garment's centerline and usable print area. Select a suitable artwork size, measure its intended position, and verify that the printed design—not only its carrier film—is properly aligned.
Use a ruler or positioning guide when accuracy is important, and secure the transfer if it could move during pressing.
For repeated production, record the approved measurements and inspect a sample before printing an entire batch.
DTF placement charts are useful starting points rather than fixed rules. As STAHLS states in its Heat Printing Placement Tips guide:
"Placement information is intended as a guideline."